Anything from the inception of this blog is copyright to Danielle Harrison ©
Showing posts with label Design for Print and Web. Show all posts

Wednesday, 15 January 2014

OUGD504 - Design for Print/Design for Print and Web: Photography

I decided to take some photographs in the studio as I haven't used it before and wanted some professional looking photos of my work.


Here are my photos for Design for Print and Web:


Here are the final photos for my Design for Print and Web:

Here I photographed, from clockwise L-R, my food menu; bookmark business card; notepad; coffee duster; coaster; drink menu; napkin; tablemat and bookend.


Here is my food menu, drink menu and notepad.


Here is my tablemat, coaster and coffee duster. There is a plate and cup on it to show you how they would be used.


Here is the photograph of my tickets for Design for Print:


Here is the photograph for my icons for Design for Print. I did photograph them in context, hanging with string above the equipment in the printroom, however, when I was uploading them to my Mac the card corrupted and I lost them all.


Here are my final posters:


Tuesday, 14 January 2014

OUGD504 - Design for Print and Web: Design Boards

Here are my design boards for Design for Web.


Here are my design boards for Design for Print and Web.
Here are my design boards for Design for Print.

OUGD504 - Design Production: Module Evaluation

1. What skills have you learnt throughout this module and how effectively do you think you have applied them?

Design for Print
For this brief I definitely learnt a lot of new skills, and improved on ones I already had. Firstly I did some practice prints using foiling and monoprinting methods, as I hadn't done them before and wanted to become more confident in them before I included them in my project. As I then applied these methods, plus screenprinting, embossing and linoprinting I began to learn a lot more about them as I went through complications and successes.
I came across a number of problems, particularly as I used mountboard for my stock - this was hard for embossing onto as well as monoprinting onto so I had to find ways around this. I had to use MDF to emboss onto my stock which didn't leave as big of an impression as I wanted, but I learnt for next time. I also realised that monoprinting didn't work with small designs onto mountboard, although it would on a thinner stock - so I screen printed these areas instead. I think by encountering these problems I have learnt a lot about stocks, inks and the processes themselves so I am very confident to do all of these processes again in the future. 
I think I have applied these well to the project because I used all the processes that were relevant to my audience and used multiple techniques that can be used (thermochromic ink, colour blends etc) to show my understanding of it. I have used text as well as image to show my understanding throughout the project and show the viewers what can be achieved. 

Design for Web
I was really excited for this brief because I got interested in web design and coding over Summer, and I wanted to push myself on it doing things I hadn't done before. I applied the (limited) HTML and CSS skills I already had, and learnt more for the site by looking at tutorials and working out the best way to do things myself. I also applied the new skills I learnt in the web sessions such as using rollover buttons. I put in a lot of time learning more about HTML and CSS so that I could achieve the design that I wanted. In the end I had experimented with drop down menus and parallax scrolling, and included page jumps, forms, responsive full background images and made sure I used web safe fonts and colours. I was really proud at the time of the outcome, but if I did it again I would have a better idea on how to make it more professionally and do things differently regarding containers and other areas I have since practiced on but couldn't do at the time. I have already learnt so much since this website that I feel it could be improved drastically in the way I have coded, but I did learn a lot of new things for the project so I am happy with it.

Design for Print and Web
For this project I concentrated on print as it was more appropriate for my project, but I also wanted to explore web as I was itching to code again.
For the print side, I wanted the project to be closely linked to the concept that it is a library cafe. Because of this, I decided to use buckram throughout the project on menu boards, placemats etc. I had already bound hardcover books before in the first year, so I already knew how to do it but I had a practice go anyway. I forgot how simple it was, so that was an easy part of the project, and I then screenprinted on top of this. I knew it wouldn't take me long to screenprint as I have already done a lot of it this year and feel confident with it. However, I didn't anticipate that it would look dull against the black buckram - to overcome this I just reprinted over the dried printed area to add another layer. This then worked, and because I am confident with screen printing it didn't take long to reprint it all. I think this shows I have applied my skills well because I have become a lot more efficient with screen printing and didn't see it as a challenge. I was also working within a tight schedule, so it wasn't a problem for that either.
I designed the screen aspect for it after the Numiko talk, and remembered how they had created the responsive Design Council website. Remembering what they said, I designed the website, tablet and mobile aspect with their words in mind. For example, on the mobile version on the Book page I only showed three bookcovers as opposed to five bookcovers on the website and tablet form. Instead of resizing the site to the screen size, I adapted them instead which I think shows a greater understanding of designing for the web.
When I was coding the website, it only took me 6 hours to do as it is a very simple site, using page jumps which I used in the Design for Web project. I really enjoy coding and I think that this shows how I can apply my skills efficiently to a project.
I also learnt how to make a gif for this project, as I feel that is a good way to present a website. This required using Photoshop which I'm not very good at, but after a few attempts I got there in the end and I can now use this method when designing for web in the future.

2. What approaches to/methods of design production have you developed and how have they informed your design development process?

I think my design production methods have developed from the fact that I have worked and learnt better by physically doing things. Rather than reading about how to foil, I just went out and did it. This is the same for all of the techniques I used really, and just learnt from my mistakes as I went. Luckily I started the production for Design for Print early on, so I had a lot of time to mess it up and try different things. From mixing colours so they overlapped correctly, to trying different methods of using thermochromic ink, I don't think I could have learnt all of this by reading from a book or watching a video, I just had to do it for myself. 
For the coding aspect of it, I experimented a lot and tried everything I could to make something work. I would start by looking at a tutorial and then just coded relentlessly and seeing how something worked best, mainly by using the Inspect Element feature on Chrome. I think this has helped me realise how I worked best, because I feel a lot more confident now with coding and printmaking. 

3. What strengths can you identify in your work and how have/will you capitalise on these?

I think an apparent strength within my work is coding. I enjoy doing it, and I don't mind spending hours trying to figure out why something isn't working which I think is important to coding as you definitely need patience! I have already capitalized on this by producing a live website and helping a lot of people in the class on their websites. By also coding the website for Print and Web even though I focused on the printed material shows that I am interested in it. To improve my skills further I am going to two web design events at the end of the month and hope to gain contacts from that, as well as putting myself out there to do websites for clients.

4. What weaknesses can you identify in your work and how will you address these for the future?

I think the biggest weakness in my work is the fact that I don't do enough drawings and ideas at the beginning stages. I explore one idea a lot, but if I like it I won't bother exploring more ideas in depth because I like to just get on with it. I don't know if this is a bad thing or not - probably is if I want to get a good grade, but when I'm working to a tight deadline it's not necessarily a bad thing. I realised this by Design for Print and Web and I did a couple more ideas at the beginning and started to research them, but not really in depth, so this is something I could improve on. 
I also think the quality of finish could be improved - I think this will just come from making more things and practicing more. For example, when I reprinted over the top of the existing screenprinted area for Print and Web, some of it isn't registered 100% which affects the quality. Also for Design for Print the finish of the work could be improved - for example the font I used bled a little because of the stock I chose, and it was hard to get the illustrations completely in centered and in line on the posters. This will just come with practice but is something I need to keep an eye on. 

5. Identify the things you will do differently next time and what you expect to gain from doing these?

  1. Explore more ideas initially - I might think of a better one.
  2. I do want to draw more as well - using hand drawn type and illustration rather than the clean, digital style I have at the moment. I think it's good to have a broad range of skills as not every project will require the same style.
  3. Try and have a better finish to my work so it looks more professional.
  4. Consider the limitations of the stock I choose and whether techniques will work on them properly as this can save me a lot of time and make the resolution look better.

OUGD504 - Design for Print and Web: Final Crit

We had our final critique for this brief, and I presented my work to about 6 people. The feedback I got was:


  • Really strong concept
  • How will I get the logo on the buckram
  • What else can I superimpose - cups, mugs etc
  • Could lasercut the buckram to show red underneath

I really like this type of crit, talking to everyone face to face and getting their feedback. However, someone else was my scribe and I wanted to take my own notes on what people was saying as I didn't get all the feedback, but I didn't feel like I could write my own notes after because the next person then had their turn so I wouldn't want to interrupt. 

OUGD504 - Design for Print and Web: Digital Proposals

I decided to propose signage and uniform as I wouldn't be able to make these.

I found a shop sign on Pinterest that would work for my logo. I wanted to have a black, portrait sign, as it would fit my logo best and the black would work with my colour scheme.
I skewed it so that it fit the sign well, but I didn't know how to make the logo seem more embedded - it looks a bit too vibrant and fake.


I then found a tutorial to put the logo onto a window pane, and I think that this looks well polished.


I tried applying the logo to an apron, but it didn't work as well as I hoped because you can tell it doesn't look real. I tried a few different things and tutorials but I can't seem to make it look realistic. This is definitely something I need to improve on.


I added the logo onto a plate and cup that I had taken a photograph of.


OUGD504 - Design for Print and Web: Final Screen Designs

Here are the final designs for the website in computer, tablet and mobile formats.

Tablet


This is a gif of the tablet form, showing you all of the pages. I think this is a good way to present it so people don't have to scroll and see all of the pages. This is how it would work on screen.


Website


Mobile
 Here is the mobile form of the website.


Here is the home page in mobile form.  The home page would have two rows instead of the columns that are on the tablet and webpage version.


On the books page, there would only be three bookcovers instead of five, so that the size wouldn't be compromised.


These are the pages for the menu page. This is what it would look like when you clicked on it. The navigation would be underlined, and you would be presented with the two tabs on the default page.


When you clicked on the left/right arrows on the Sandwich, it would switch to different categories such as paninis.
Then if you clicked on one of the options, it would drop down the description.


If you clicked on the second tab for drinks, this is what it would look like.


The contact page would be elongated so the user will have to scroll to see all of the information.


Wednesday, 8 January 2014

OUGD504 - Design for Print and Web: Making a Gif

I decided a good way of presenting the website in iPad version as a gif on my Behance and presentation. This way the viewer can see all of the pages and don't have to scroll to do so, and can see how it works. 

I started by opening Photoshop, and opening the timeline tab, by going on Windows > Timeline. I then imported the images that I wanted to be made into a gif, and put them each on a separate layer.


I made lots of frames so that the time would be delayed, so I had 15 frames of the same image for each layer.


However, when I went to save this, it was too big of a file. So I made the canvas a lot smaller to see if that worked, which it did, but it was too small to see.


Then I went onto a website where I could make my own gif, and this was very easy until I realised it had a link to the source in the corner of it which I didn't think looks very professional.


I then noticed the seconds underneath the frame and realised you can change the time!


I changed the time to 1.5 seconds each so that it delayed and only had the four frames I needed, which means it could be saved.


I saved it for web as a gif.


Here is the final gif:


I am very happy with it, and I think that it will improve the presentation of my branding on Behance with this, rather than each page as a static image.

Tuesday, 7 January 2014

OUGD504 - Design for Print and Web: Making the Project

I started to make the project now I have done all of the designs.

I started by cleaning and exposing my screen for all the printed material, and while the screen was drying I started making the buckram boards for the menus, placemats, coaster and notepad so I could screenprint on them.


I started practising on a test bit of greyboard to see how to do it, as I  haven't done it in a long time and wanted to make sure I remembered what I was doing.


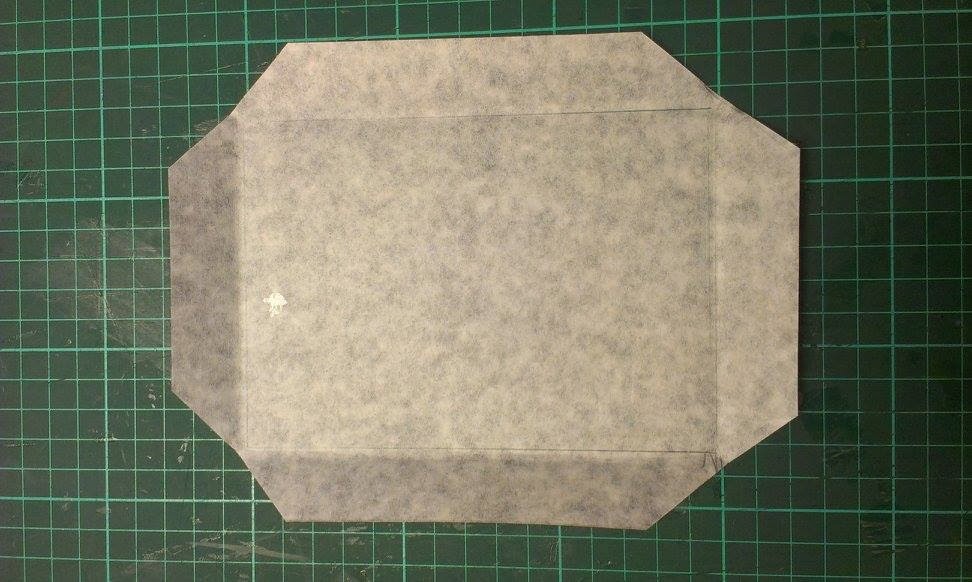
I placed the greyboard onto the buckram, and marked an outline around it. Then I marked a ruler's width around the outline. Then I measured 0.5cm from each corner, and marked there as well, as this will be the fold over the greyboard. I then cut it out using a scalpel.


I used PVA glue to stick the greyboard to the buckram.


Then I folded over two of the sides onto the greyboard.


I made sure the remainder of the stuck down flap was straightened out so that the other flap folded neatly.


This is what it looks like with all flaps stuck down, and it actually worked quite well, better and easier than I was expecting.


I then put on the endpage to see how that looked, and I am really happy with it.


I then started working on the real ones, and started marking out where I needed to cut.


Here is the outline I need to cut with a scalpel.


This is what it looked like when I cut it out.


Then I stuck the greyboard to it.


I had to make sure the first flap was straight so that when I folded the other one over it looked neat like this.


This is what it looks like from the back.


And this is what it looks like from the front without the endpage stuck to it.


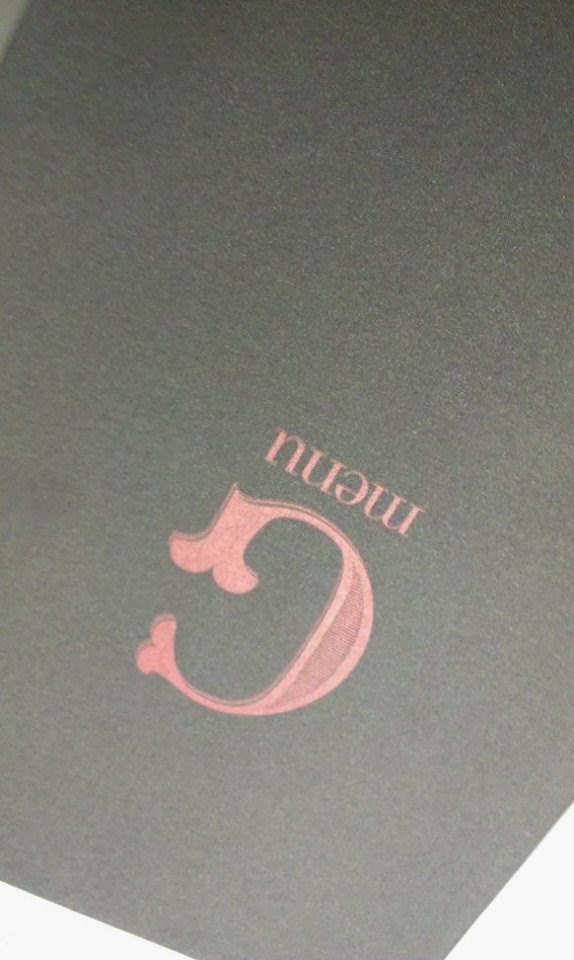
This is the drinks menu.


I then started to make the colour for the screenprinting and I wanted to make it the same as the endpage, so I used crimson and added a small amount of cyan to make it darker.


I began testing different shades against the paper.


I then got my colour correct and was happy with it.


I then went to do my lasercutting, for the coffee duster and bookends.

I started in Illustrator by designing some possible bookends. I need to make a straight, flat bottom so that it would stand up. The first one I did was the third one, but I don't think it matches the brand having the big shape underneath because it's not seen anywhere else. The second one I think would be too flimsy, and I didn't like how it changed the shape of the logo. So the first one I liked the best because the small rectangle is very subtle, and will help it stand.


This is the coffee duster design, I added a little circle tab which you can hold, and I made it 10x10cm as that's the circumference of a mug.


When I went to the lasercutter, I started doing the coffee duster first. I used clear perspex as that would match my brand closest - there was a black but I think that would make it look dirty as it's quite dull and the cocoa powder wouldn't stand out on it. But clear is bright, clean and would be easier to see.

This is what it looked like once it had cut. It still has its protective cover on it at this point, which I peeled off afterwards to reveal the perspex. I was very happy with how this turned out.


Here is the lasercutter cutting the wood. This took a long time, because the MDF I was using was 9mm, so the laser had to go over it a lot of times.


This is what it looked like when it was cut, so I now need to paint it red so that it fits in with the brand and hides the burn marks. I made four of these.


I went to screenprint onto the buckram, and tested it out on some scrap pieces of buckram.
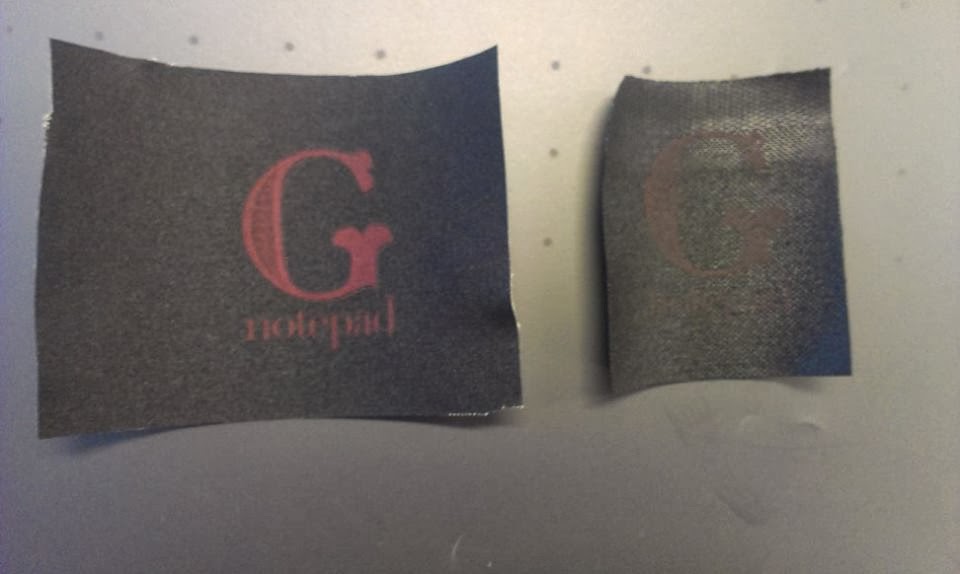
However, when the ink dried, it was very, very dull on the black and you could barely see it.

To get around this, I decided to try two things - one, overprint onto a dried print because when it is wet, the ink just comes off if you try to pull over it again. And two, try it on a different buckram which may absorb less.

The right is the different style buckram which was even more absorbant, and the first is the overprint which worked a lot better.


I started to do it on the real buckram now I have realised what will work. I printed onto the true grain so I can register my work.


Then I put the buckram underneath the vacuum and put it into place.


I then taped it down with masking tape as this will stop it from moving - the vacuum doesn't work very well with this material. 


The masking tape also helped when reprinting as I could register it perfectly without having a double print.


I then decided to alter the endpages on the menus as they seemed a bit too big, considering the size of them.


I cut down a 1cm on each side which looked a lot better. I printed a mock up of the menu to see how it would look.


I also chopped the food menu down, this was before.


This is how they will both look once I've printed the menus out on the correct stock.


These are a couple of pictures I took once the screenprint ink had dried. I was very happy with how these turned out, as I thought I had a major problem on my hands when they didn't work at first.


I then started to think about how I can paint the bookends. I decided to sand down all the burnt edges because I didn't want the paint to look gritty.


I knew I would need a primer on the G before I painted it red, because it will just absorb it. I thought about spraypainting it white for the primer. I put it in the spray paint booth, which is normally used for etching.


I watered down acrylic to put it in a spray paint gun. However, it was still too thick for the gun and clogged it up. The more watered down it is, the thinner it will be and won't be a good primer. However, by painting it on the brush strokes will be visible.


I then tried a solution of pva glue and water to make a sealant.


I painted this on, ready to be painted red.


I got a paintbrush and started painting on the red acrylic. I was very surprised actually, as it came on quite thick and didn't seem to absorb too much into the wood.


Once the first one had been painted, I put a seal on the next G.


I also tried painting just the front to see if leaving the burnt sides would look good, but I decided it looked too unfinished.


I painted two layers onto each G, and I think that this is enough - it isn't completely opaque and smooth, but I like the textured finish.


I also Pantone matched the red so that it would be the same when I printed the digital logos and be consistent through the brand.


This is what the coffee duster stencil looked like when I took off the protective cover.


As I had Pantone matched the red, this is what it looked like when it digitally printed.


This is the screenprinted napkin I did. This was quite hard as the material kept sticking to the screen.


I wrapped nylon around the notepad and menus so that the menus and paper could be easily removed. 


I wrapped the nylon on both ends.


This is the front of the placemat.


This was the inside of the placemat.