I started by cleaning and exposing my screen for all the printed material, and while the screen was drying I started making the buckram boards for the menus, placemats, coaster and notepad so I could screenprint on them.
I started practising on a test bit of greyboard to see how to do it, as I haven't done it in a long time and wanted to make sure I remembered what I was doing.

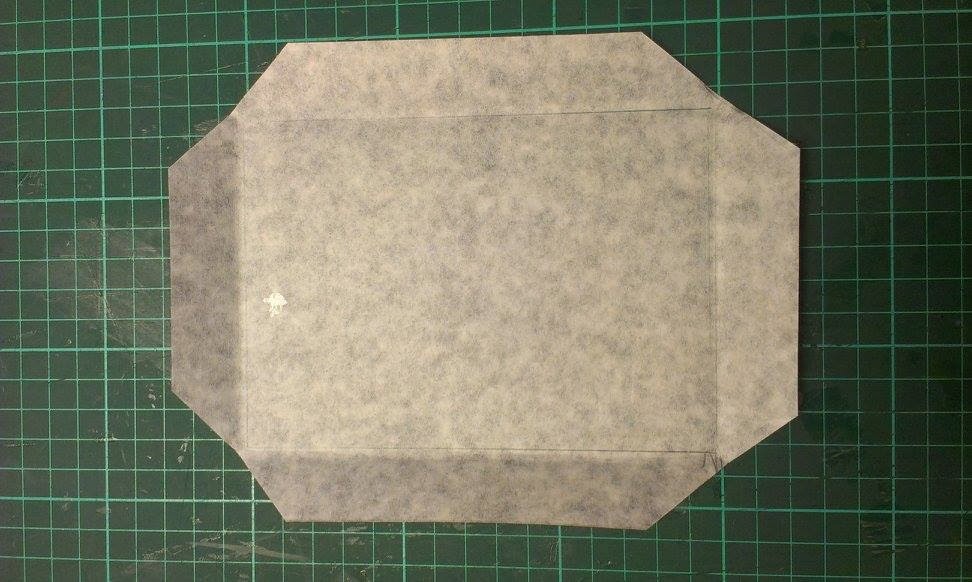
I placed the greyboard onto the buckram, and marked an outline around it. Then I marked a ruler's width around the outline. Then I measured 0.5cm from each corner, and marked there as well, as this will be the fold over the greyboard. I then cut it out using a scalpel.

I used PVA glue to stick the greyboard to the buckram.

Then I folded over two of the sides onto the greyboard.

I made sure the remainder of the stuck down flap was straightened out so that the other flap folded neatly.

This is what it looks like with all flaps stuck down, and it actually worked quite well, better and easier than I was expecting.

I then put on the endpage to see how that looked, and I am really happy with it.

I then started working on the real ones, and started marking out where I needed to cut.

Here is the outline I need to cut with a scalpel.

This is what it looked like when I cut it out.
Then I stuck the greyboard to it.

I had to make sure the first flap was straight so that when I folded the other one over it looked neat like this.

This is what it looks like from the back.

And this is what it looks like from the front without the endpage stuck to it.

This is the drinks menu.

I then started to make the colour for the screenprinting and I wanted to make it the same as the endpage, so I used crimson and added a small amount of cyan to make it darker.

I began testing different shades against the paper.

I then got my colour correct and was happy with it.

I then went to do my lasercutting, for the coffee duster and bookends.
I started in Illustrator by designing some possible bookends. I need to make a straight, flat bottom so that it would stand up. The first one I did was the third one, but I don't think it matches the brand having the big shape underneath because it's not seen anywhere else. The second one I think would be too flimsy, and I didn't like how it changed the shape of the logo. So the first one I liked the best because the small rectangle is very subtle, and will help it stand.

This is the coffee duster design, I added a little circle tab which you can hold, and I made it 10x10cm as that's the circumference of a mug.

When I went to the lasercutter, I started doing the coffee duster first. I used clear perspex as that would match my brand closest - there was a black but I think that would make it look dirty as it's quite dull and the cocoa powder wouldn't stand out on it. But clear is bright, clean and would be easier to see.
This is what it looked like once it had cut. It still has its protective cover on it at this point, which I peeled off afterwards to reveal the perspex. I was very happy with how this turned out.

Here is the lasercutter cutting the wood. This took a long time, because the MDF I was using was 9mm, so the laser had to go over it a lot of times.

This is what it looked like when it was cut, so I now need to paint it red so that it fits in with the brand and hides the burn marks. I made four of these.

I went to screenprint onto the buckram, and tested it out on some scrap pieces of buckram.
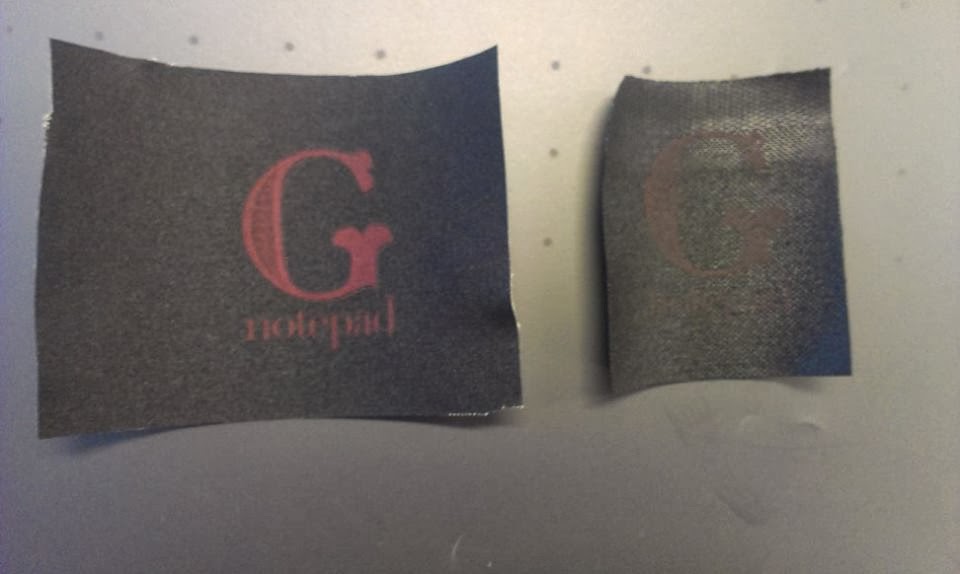
However, when the ink dried, it was very, very dull on the black and you could barely see it.
To get around this, I decided to try two things - one, overprint onto a dried print because when it is wet, the ink just comes off if you try to pull over it again. And two, try it on a different buckram which may absorb less.
The right is the different style buckram which was even more absorbant, and the first is the overprint which worked a lot better.
I started to do it on the real buckram now I have realised what will work. I printed onto the true grain so I can register my work.

Then I put the buckram underneath the vacuum and put it into place.

I then taped it down with masking tape as this will stop it from moving - the vacuum doesn't work very well with this material.

The masking tape also helped when reprinting as I could register it perfectly without having a double print.

I then decided to alter the endpages on the menus as they seemed a bit too big, considering the size of them.

I cut down a 1cm on each side which looked a lot better. I printed a mock up of the menu to see how it would look.

I also chopped the food menu down, this was before.

This is how they will both look once I've printed the menus out on the correct stock.

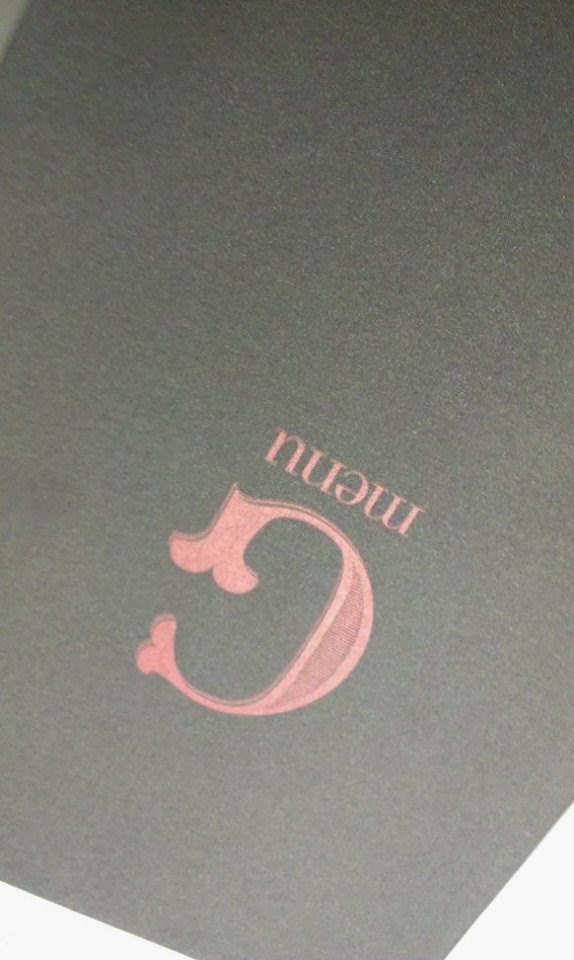
These are a couple of pictures I took once the screenprint ink had dried. I was very happy with how these turned out, as I thought I had a major problem on my hands when they didn't work at first.

I then started to think about how I can paint the bookends. I decided to sand down all the burnt edges because I didn't want the paint to look gritty.


I knew I would need a primer on the G before I painted it red, because it will just absorb it. I thought about spraypainting it white for the primer. I put it in the spray paint booth, which is normally used for etching.

I watered down acrylic to put it in a spray paint gun. However, it was still too thick for the gun and clogged it up. The more watered down it is, the thinner it will be and won't be a good primer. However, by painting it on the brush strokes will be visible.

I then tried a solution of pva glue and water to make a sealant.

I painted this on, ready to be painted red.

I got a paintbrush and started painting on the red acrylic. I was very surprised actually, as it came on quite thick and didn't seem to absorb too much into the wood.

Once the first one had been painted, I put a seal on the next G.

I also tried painting just the front to see if leaving the burnt sides would look good, but I decided it looked too unfinished.

I painted two layers onto each G, and I think that this is enough - it isn't completely opaque and smooth, but I like the textured finish.


I also Pantone matched the red so that it would be the same when I printed the digital logos and be consistent through the brand.

This is what the coffee duster stencil looked like when I took off the protective cover.

As I had Pantone matched the red, this is what it looked like when it digitally printed.

This is the screenprinted napkin I did. This was quite hard as the material kept sticking to the screen.

I wrapped nylon around the notepad and menus so that the menus and paper could be easily removed.

I wrapped the nylon on both ends.

This is the front of the placemat.

This was the inside of the placemat.

No comments:
Post a Comment